
Rich and deep colours
Prerequisites: This tutorial is aimed for more advanced photographers who are familiar with using Masks and Adjustment layers.
If you had a look at my gallery, you probably noticed that I absolutely love deep and rich colors in my dog photography. I will give you a few tips on how to achieve rich and earthy tones in your photos. This tutorial is aimed for more advanced photographers who are familiar with using Masks and Adjustment layers.
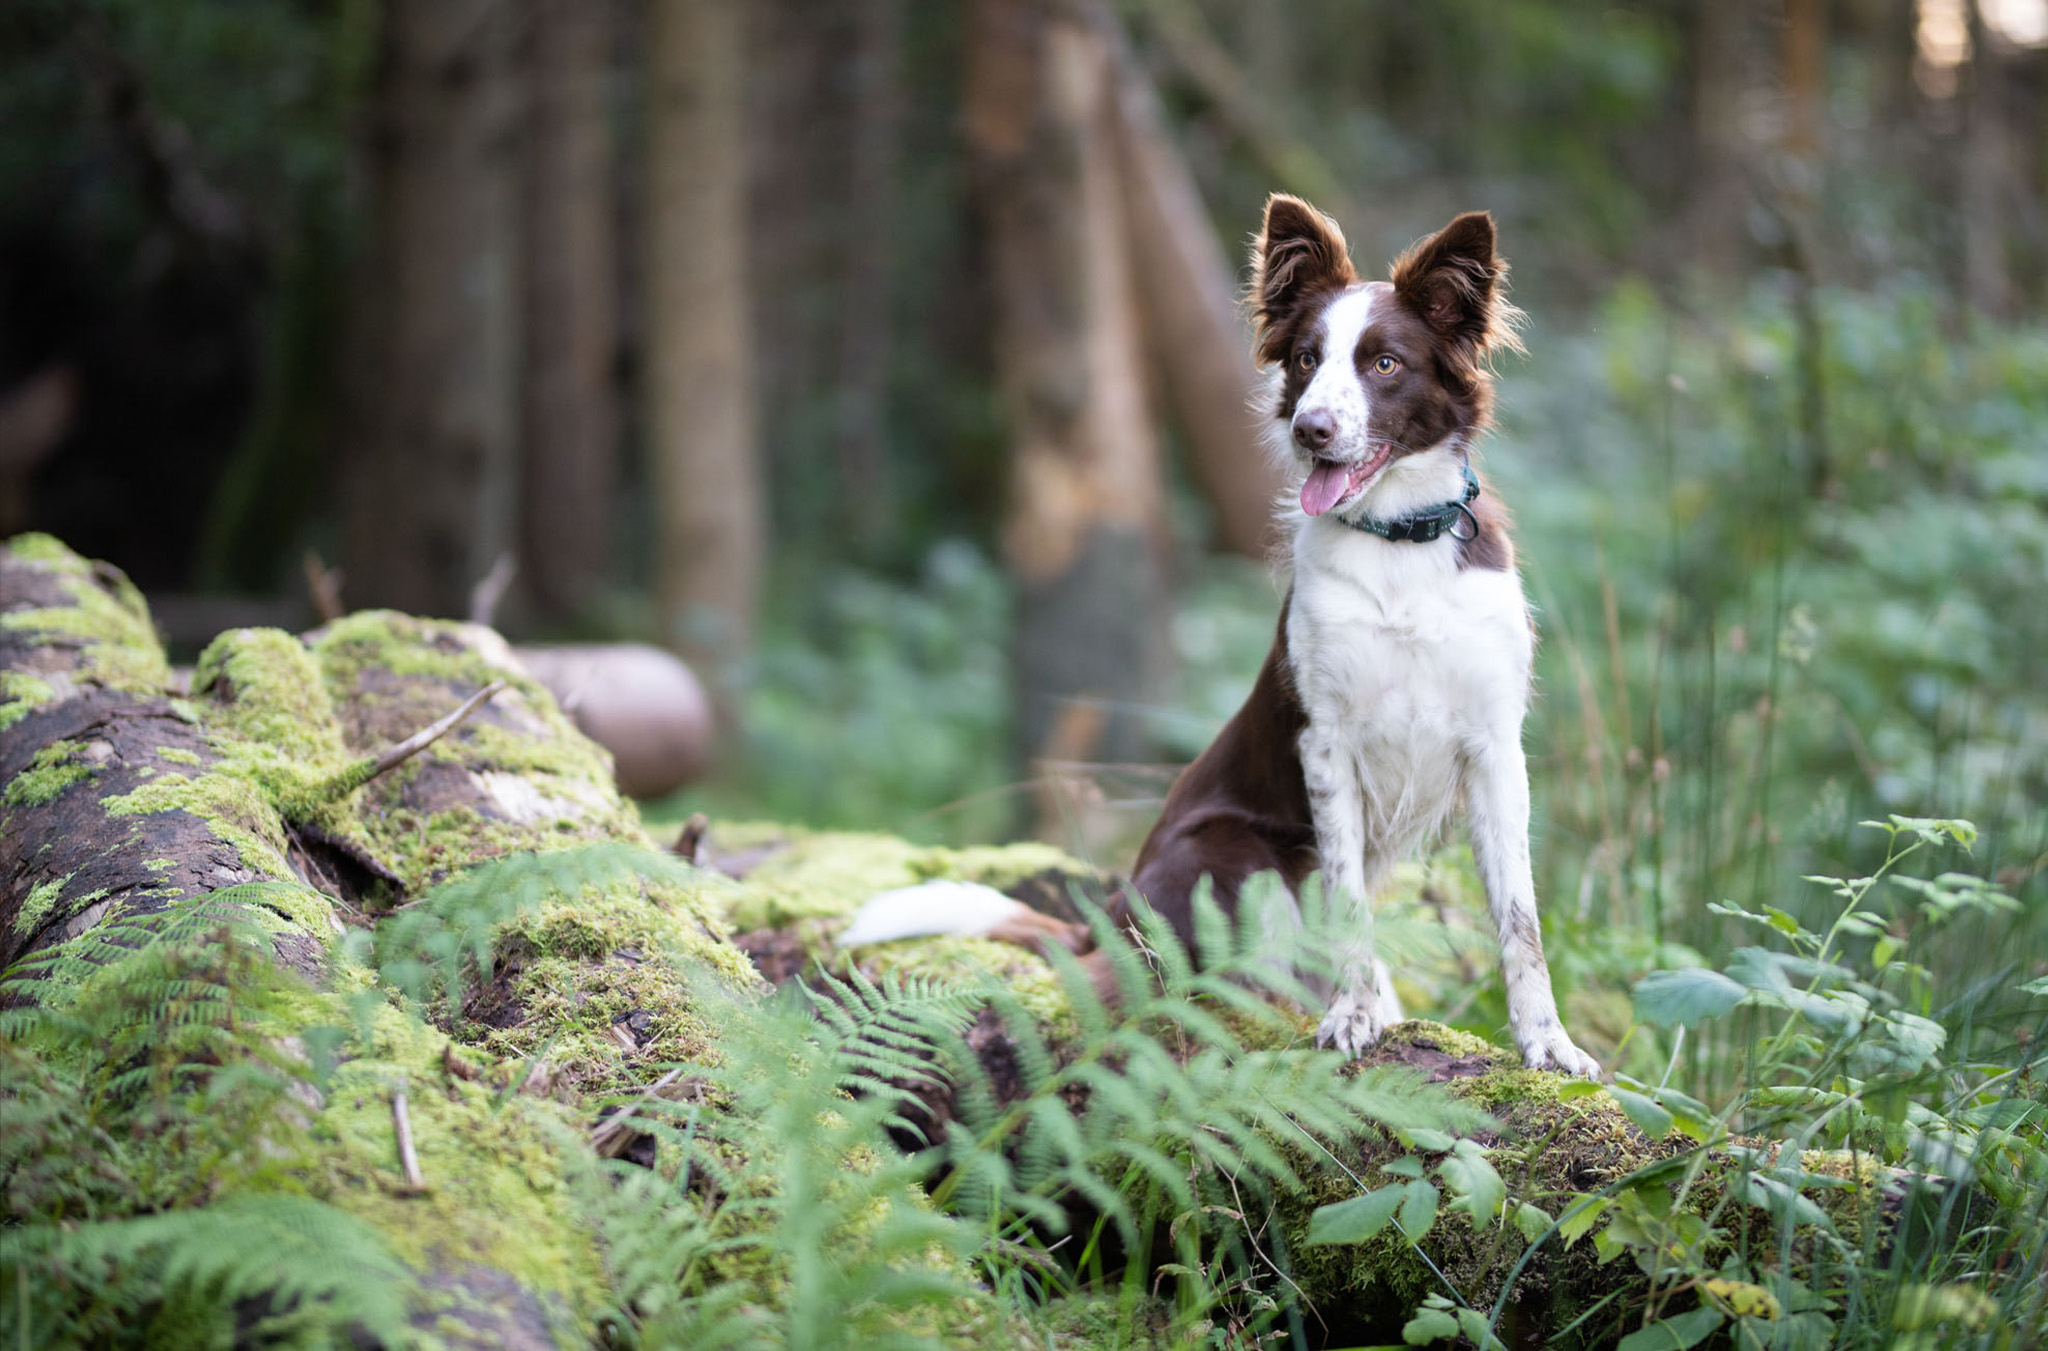
The very first step is choosing the right photo, that will actually fit this style. I like to approach editing on one by one basis, rather than applying a preset, that might not necessarily look great on every single photo. For this type of edit, I typically choose photographs that were shot in a shady area – a park or a forest, where there’s very little, or no sky visible at all. Trying to achieve dark look with earthy tones might not be the best idea on a photo that was shot in the open area, on a bright day.
Changing White Balance
I use Lightroom for my raw file processing, but CameraRAW offers the same functionality, so you can use either. I rarely do any local adjustments in Lightroom. I find masks in Photoshop much more convenient to use, so the changes I made here I applied to the whole photo.
I increased the white balance from 4500 to around 6900 – the higher the value, the “warmer” the colors. As you can see, it already made a huge change and helped me decide in which direction I want to go when choosing the final color palette.
I also made the picture slightly darker by reducing the exposure. Then, I adjusted the highlights just a bit, to make sure the white fur is not overexposed.

Soft background aka Orton Effect
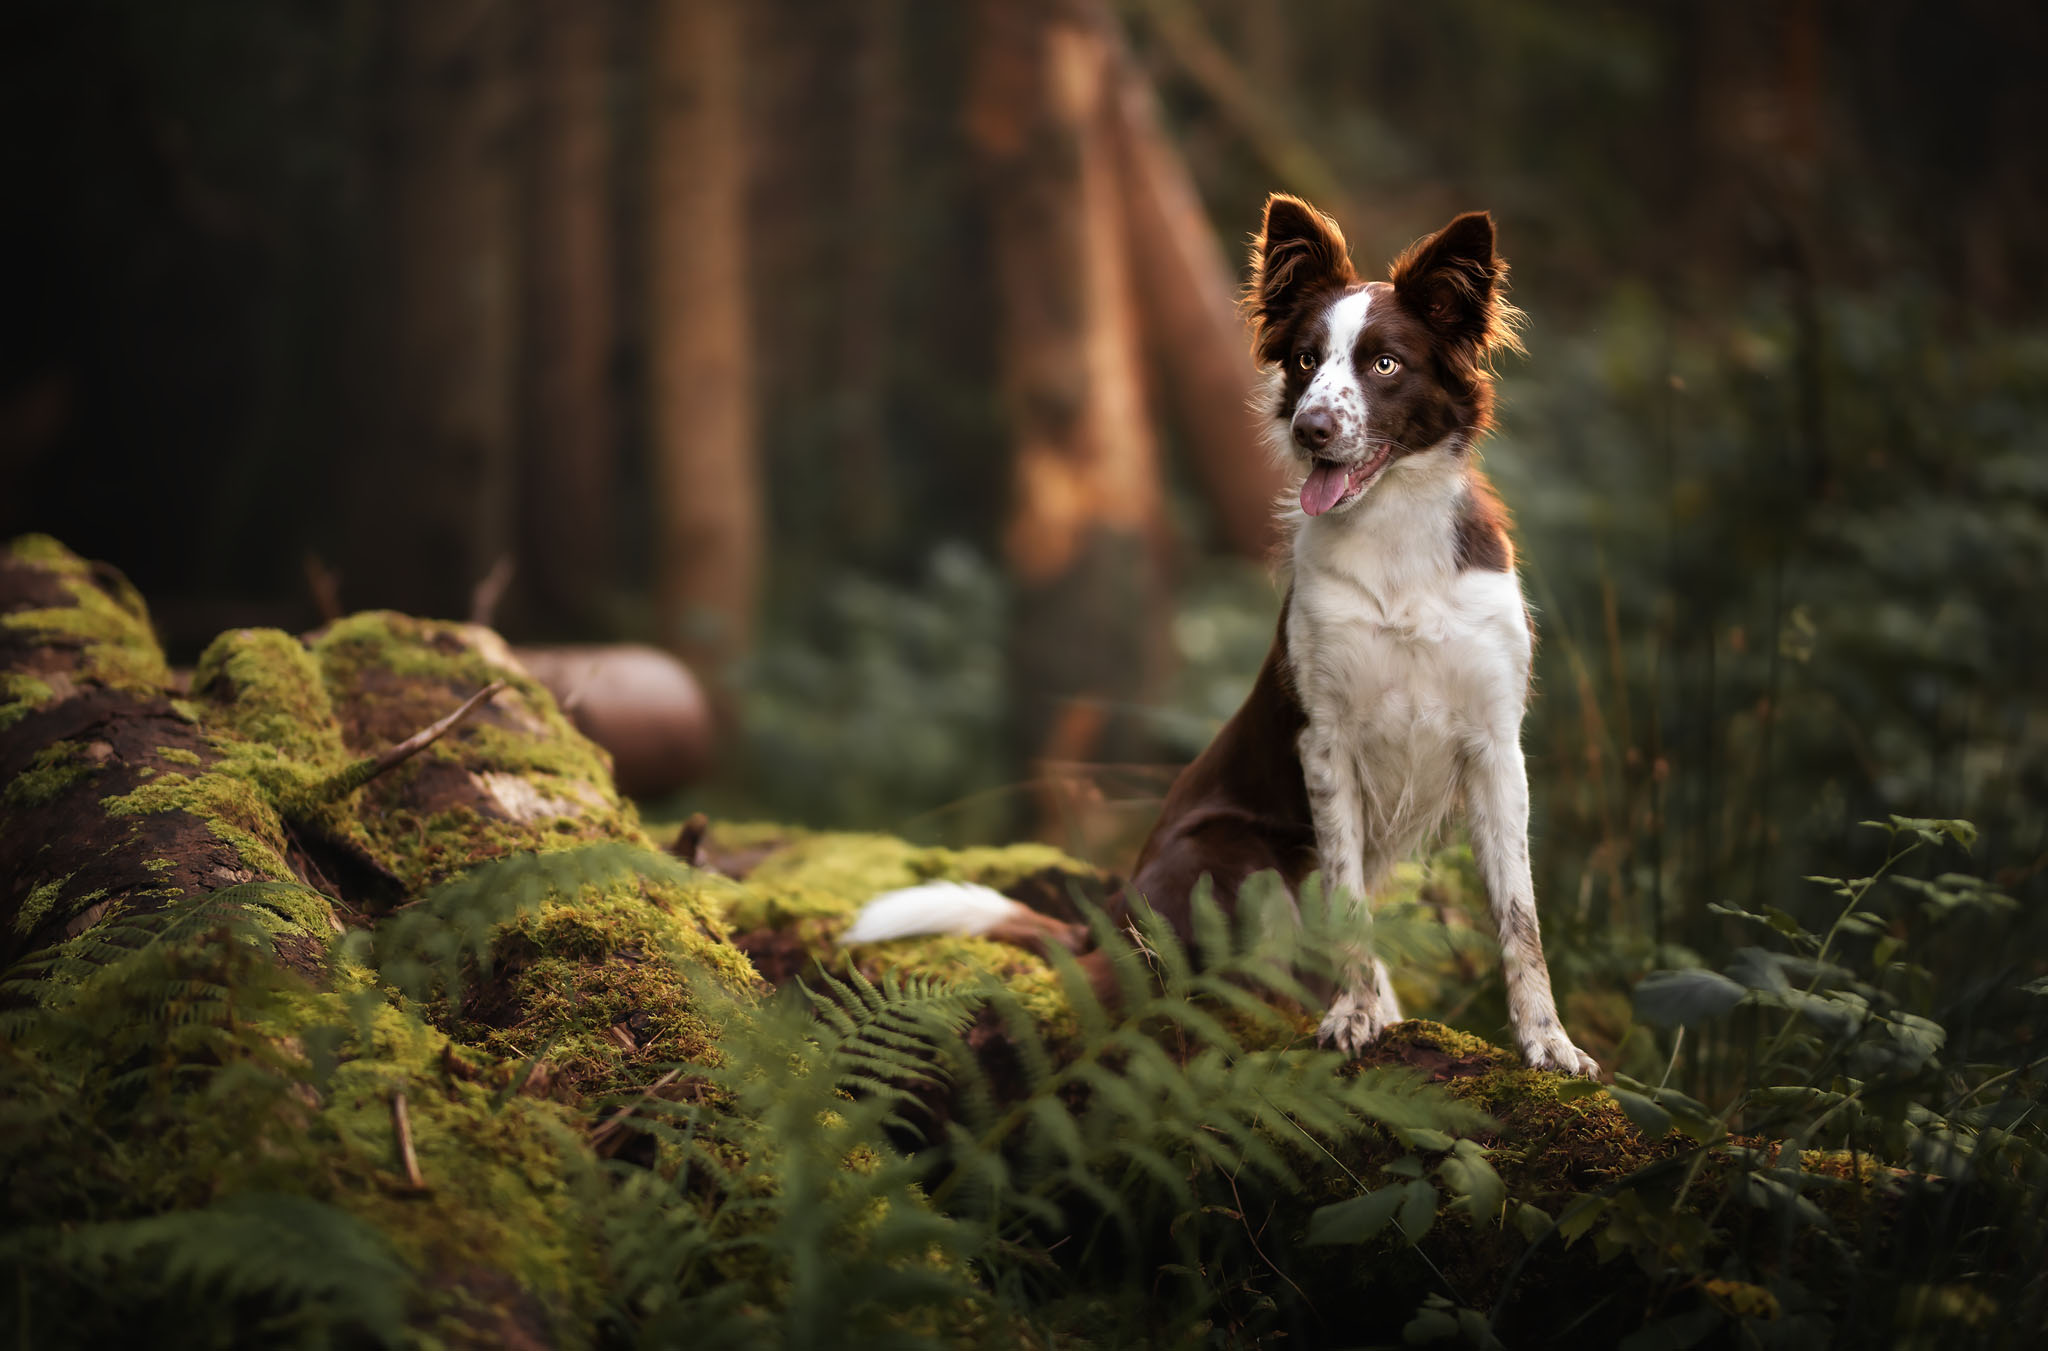
Let’s move to Photoshop and start by applying a special layer that will soften the background. This effect is very popular in landscape photography, but I decided to use it when editing backgrounds in my dog photos and created my own simplified photoshop Action. It gently blurs the image and creates a nice, “dreamy” effect. I apply it to many of my pics, it’s very versatile! Note that I’m applying the effect to the background only, so make sure to create an appropriate mask. I’ll cover that topic in detail in another post.
You can download the Photoshop Action here, but in case you would like to try it yourself, here are the steps:
- Duplicate you background layer
- Change the Blending Mode to “Soft Light”
- Set the layer opacity to around 40%
- Apply Gaussian Blur – usually values between 5 and 40px work best but that depends on the resolution of the photo. Try and experiment and see what you like the most!
- You can change the Opacity of the background layer to control the strength of the effect.
It might look like a subtle change, but trust me, it makes a huge difference to the final result!
Flattening the shadows
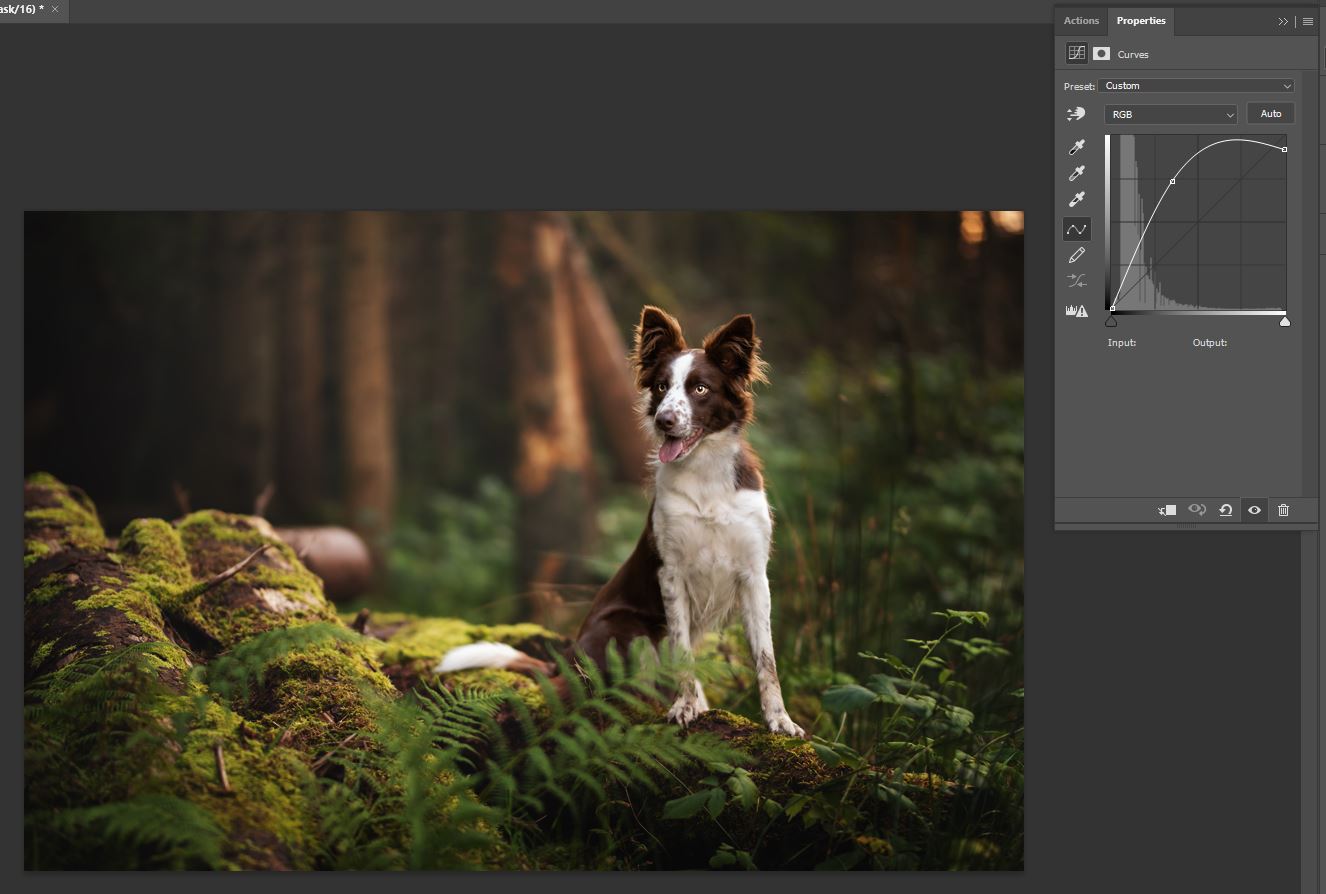
Finally, I like to use Curves to darken the background and give it a matte look. This will make the dog pop even more, because clipping the shadows a bit will make the background will appear less “busy”.
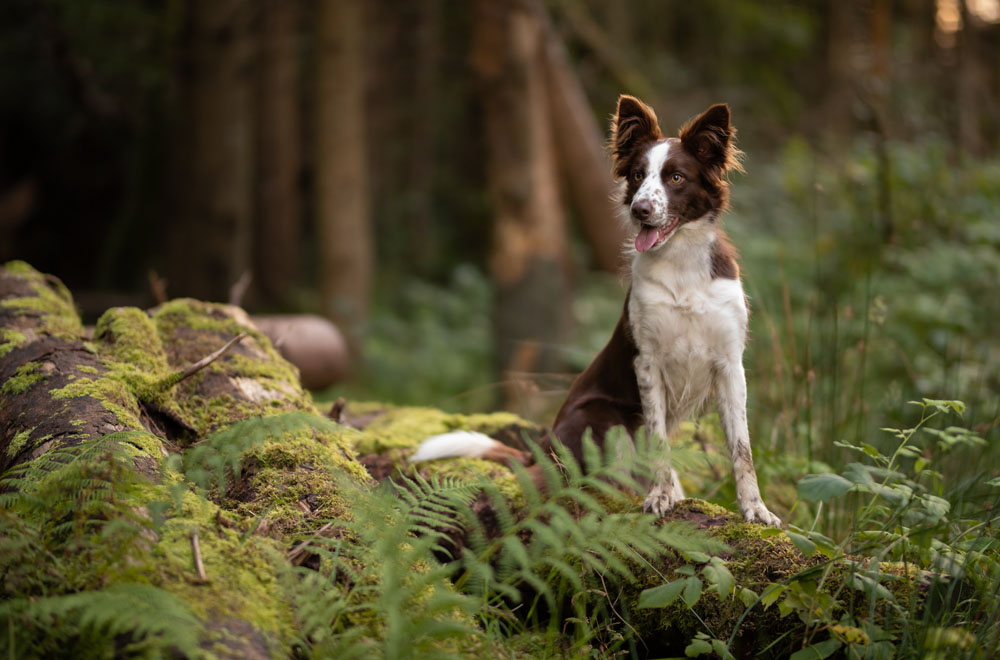
The first step is to create a new Curves adjustment layer. To make the background darker, I drag the left side of the curve (which represents the darker areas of the picture) down. The next step is to clip the shadows. I grab the “end” of the curve and lift it a bit – see the screenshot for reference. Your curve should have a very similar shape, but try to experiment and see how changing the curve affects the background. Don’t worry that the background looks very dark right now, we will fix that in a moment.
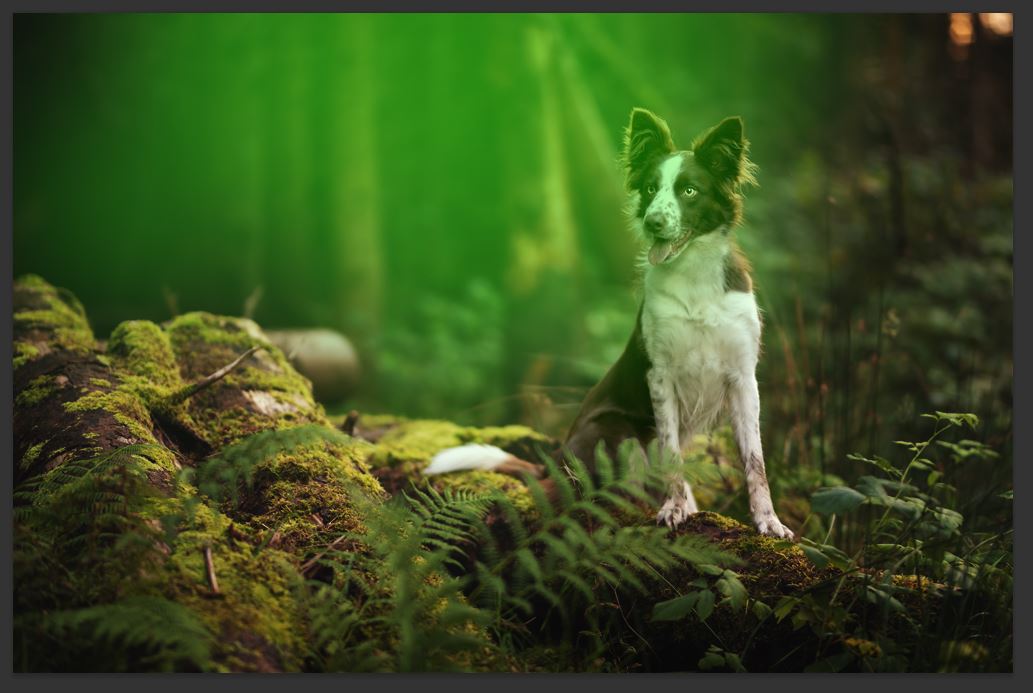
Once I’m happy with the overall background, the final step is to create a bit of light/flare. Pay attention to where the light should be coming from, so it’s matching the overall scene! First, I like to create a mask (see the green area in the screenshot) and then, I create a new Curves adjustment layer. In the previous step, I wanted to make colors darker. Now, I want the opposite, so I’ll be lifting the right side of the curve, which represents the lighter colours. Making the area around the dog will help focus the attention on the subject.

I hope you find my tips useful. If you have any other questions, post a comment below. I’d also love to see your photos edited in a similar style!
[…] to help emphasise that dramatic light. I also used Orton effect, which I discussed in my previous post, to add that dreamy, soft look to the first […]
Super